How to Take a Sample
- Submit only one plant type per sample.
- Collect live, symptomatic tissue: The lab needs living tissue to identify the pathogen. Place samples in resealable plastic bags; use paper bags for fungal tissue.
- Include a range of symptoms: Collect leaves or sections showing different stages of the disease, from early signs to more advanced ones.
- Do not send dead or dried plants.
- Poor samples may be rejected or undiagnosable.
- Blot wet foliage dry with paper towels to prevent rot.
- Refrigerate samples until shipping; avoid heat exposure.
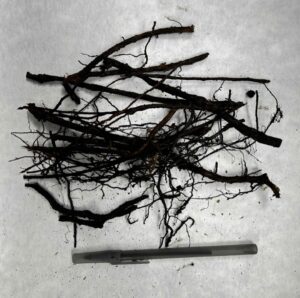
- Send as much of the plant as possible (if applicable): While leaf damage might be evident, the problem’s source could lie in the roots. Include roots, stems, leaves, and flowers. If the whole plant is too large, consider digging up a generous handful of feeder roots for testing.
- Use a box for packaging; include ice packs if needed.
- Ship early in the week for the best condition.
- Take photos: Digital images of both healthy and sick plants, including close-ups of symptoms, can be very helpful for the diagnosis.
- Complete the Plant Disease Diagnostic Form for each sample.
- Follow specific submission instructions for your specimen type.
Where to Send the Samples
- Physical samples can be sent or brought to 1500 Research Parkway, Suite A130, College Station, TX 77845
- Business hours are Monday–Friday, 8:00 am–5:00 pm (closed 12:00 pm–1:00 pm)
Sampling Based on Symptomatic Tissue
Symptomatic Tissue |
Sampling and Packaging |
| Entire plant | When possible, please send the entire plant, including roots.
If it is not possible to send an entire plant, send the root system, aboveground symptomatic material, and the lower 6–8 inches of the stem. |
| Leaves with leaf spots/necrosis | Collect leaves showing all stages of infection. Make sure compound leaves are collected with leaflets attached to petioles. Also include twig segments with leaf samples. |
| Leaves with marginal necrosis/scorch | Send roots and aboveground symptomatic leaves. |
| Abnormal patterns/growth | Collect tissue exhibiting mosaic patterns (yellow and green mottling), chlorotic or necrotic spots and streaks, leaf curling, wilting, stunted growth, and/or flower deformities. |
| Leaf, stem, and branch dieback | Send several affected parts. Cut stem/branch samples so that a short piece of live, healthy tissue is attached to the diseased portion. |
| Fungal tissue | Mushrooms and other fungi rot quickly, so they need to be stored properly. Never store a fresh mushroom in a plastic bag because it will quickly be destroyed. Paper bags and tupperware containers are best for short-term storage of mushrooms. |
| Roots | Collect 1-2 cups of roots from multiple locations around the plant.
Select a mix of large and fine roots. Sample symptomatic and live roots. For trees: sample 8-10 inches under the soil line. |
| Witches’ broom/proliferation | Collect shoots from areas displaying unusual symptoms like excessive thorniness, distorted new growth, and unusual flower clusters (rosettes or witches’ brooms).
Collect several six-inch sections from various locations on the plant, including blooms if present, and ensure the samples are placed in a plastic bag without added moisture. |
| Galls | On twigs or limbs:
On leaves:
|
| Vegetables and fleshy fruit | Do not send specimens of advanced stages of fruit rot. Select plants showing early to intermediate symptoms. |
| Turfgrass | Please do not send completely dead turf grass.
Collect two or three squares (each 3×3 inches square), with at least one inch of attached soil and roots, from the edges of affected areas. Include both dying and apparently healthy plants. |
| Soil | We only test soil for the presence of plant parasitic nematodes.
If nematodes are suspected, collect approximately 1 pint of soil to a depth of 6–8 inches and include plant roots when possible. Place the sample in a resealable quart-size bag. Keep soil samples cool and out of direct sunlight. Do not let samples dry out, but do not add water. |
Common Landscape Plant Diseases
Disease |
Tissue needed for testing |
| Root rot | 1-2 cups of roots |
| Bacterial leaf scorch | Symptomatic leaves attached to twigs/branches |
| Anthracnose and leaf spots | Symptomatic leaves |
| Oak wilt, Verticillium wilt, Dutch elm disease | Branches having wilted, yellowing, or dying leaves that are 1 to 2 inches in diameter and about 6 inches long Bole samples of sapwood |
| Turfgrass diseases | Area where symptoms progress/transition, including leaves, stolons, runners, & roots |
| Rose rosette virus | Canes with leaves displaying unusual symptoms like excessive thorniness, red or distorted new growth, and unusual flower clusters (rosettes or witches’ brooms) |
| Phytoplasma | Areas displaying unusual symptoms like yellowing, stunted growth, and abnormal development |
| Palm Fusarium | Yellowing or browning leaflets, often starting on one side of the leaf blade |
| Nematodes | Approximately 1 pint of soil, roots exhibiting stunting or galls |
| Ornamental virus | Tissue exhibiting mosaic patterns (yellow and green mottling), chlorotic or necrotic spots and streaks, leaf curling, wilting, stunted growth, and/or flower deformities |
Common Vegetable and Fruit Diseases
Disease |
Tissue needed for testing |
| Root rot | 1-2 cups of roots |
| Anthracnose | Symptomatic leaves and fruits |
| Mildew | Stems with attached leaves |
| Spots/lesions | Symptomatic leaves and fruits |
| Nematodes | Approximately 1 pint of soil, roots exhibiting stunting or galls |
| Bacterial spot/wilt/canker | Symptomatic plant material exhibiting spots, wilting, soft rot |
| Virus | Tissue exhibiting mosaic patterns (yellow and green mottling), chlorotic or necrotic spots and streaks, leaf curling, wilting, stunted growth, and/or flower deformities |


